
The following reports can be used to aide in determining athletic eligibility for students.
Information regarding Interscholastic Athletics can be found on the Interscholastic Athletics | NC DPI website. Eligibility Requirements are listed in the information from this website.
Attendance Report
Navigation: Attendance Office > Reports > ADM and ADA Detail Report
The ADM and ADA Detail report displays each student's present and absent days for the date range specified when running the report.
ADM and ADA Detail | Infinite Campus
- Enter the Start and End Date for the semester prior.
- Select the Detail report type.
- Select Daily Approximation to review whole day absences.
- Choose CSV to export the report and open into Excel.
- Select which calendars to include (the calendar selected in the context is the default, but if the user has access to more than one calendar, more than one can be selected)
- Generate the report to export the data.
Each student will be listed with their membership days, absent days, and present dates for the date range selected. Review the Absent Days to help determine student eligibility.

Grades Report
Navigation: Reporting > Ad Hoc Reporting > Filter Designer
Posted Grades can be exported using an Ad Hoc filter. Using posted grades should be used instead of transcript grades, since mid-year averages are not included in the transcript grades. Use the information below to create an Ad Hoc for grade information. Please note that the filter options may vary based on the setup for the PSU/school. This report will provide one line per student per grade.
Semester 1 Grading Ad Hoc
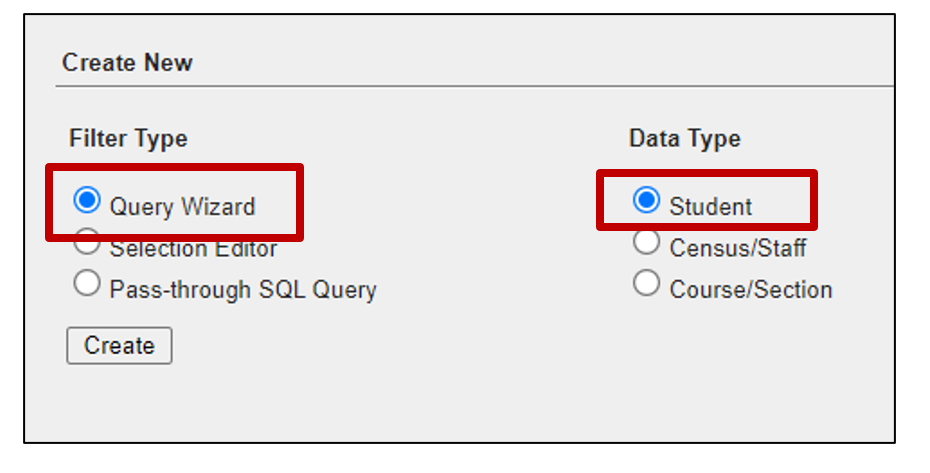
- Select Query Wizard as the Filter Type.
- Select Student as the Data Type.
- Click Create to begin.
- Enter a Name for the Query. Include the term in the name. Add a short description to help users know what is included in the filter.

- Select the fields to include for the filter. Fields in the Grading portion are posted grades. Below are some recommended fields to include.
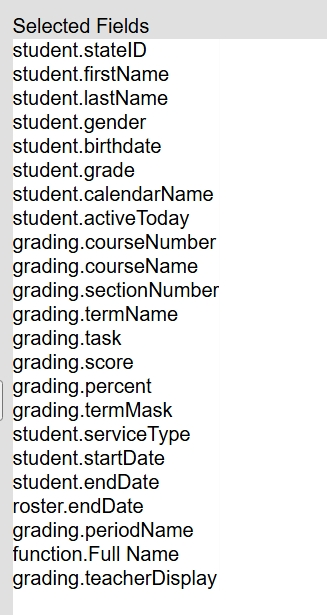
- Add a function to put the first and last name together: The constant value is a space.

- Add a function to put the first and last name together: The constant value is a space.
- Click Next to continue to the filter options.
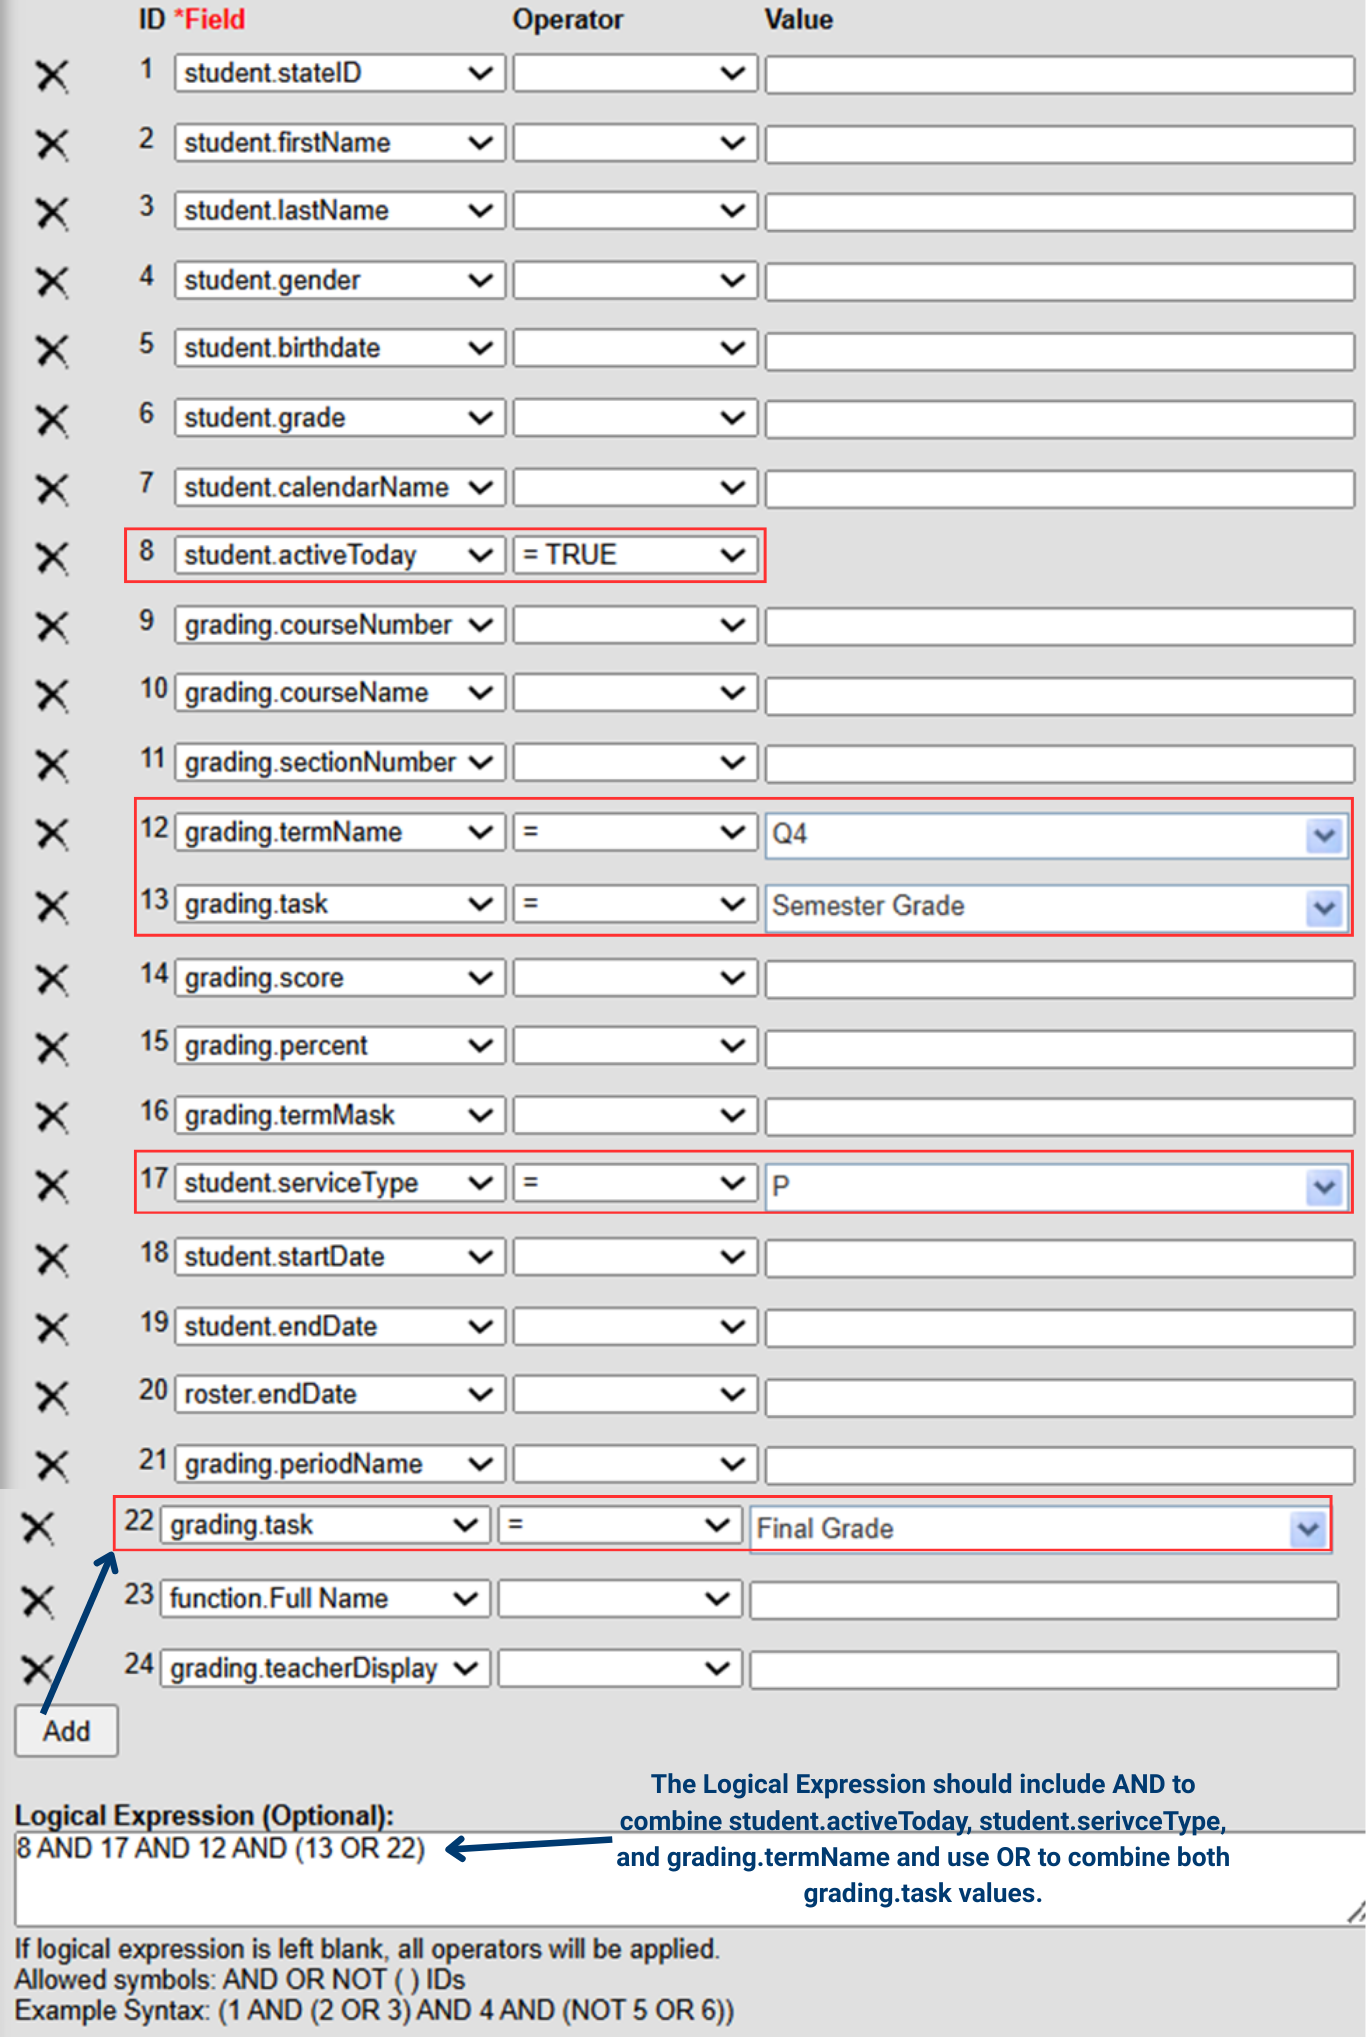
- When selecting the filter options, you will need to know the grading tasks names, such as Semester Grade, Final Grade. These can be found in Grading & Standards > Grading Setup > Grading Task Setup. You will also need to know the term names, such as Q1, Q2. These can be found in Scheduling & Courses > Calendar Setup > Term Setup).
- To ensure you have the correct information, you will need to filter for active students with a primary enrollment and for grades in the corresponding term (i.e. Q2) and the corresponding grading task names (i.e. Semester Grade). Below are recommended filters.
- student.activeToday=TRUE
- student.serviceType=P
- grading.termName=Q2 - (this will be the term found in Term Setup for the school)
- grading.task=Semester Grade - (this will be the Grading Task name for the corresponding term)
- grading.task=Final Grade - (Remember to add another grading.task in the filter to include both semester and final grades)
- Remember when using more than one filter, a Logical Expression will be needed so the filter knows how to meet the criteria selected. The logical statement will depend on the ID for the field. In the example below, the student.activeToday ID is 8. So, when using it in a logical expression you will refer to ID 8.
- We need to tell the system how a student must meet the criteria listed in the filter. We need the student to be active today for the primary enrollment and include semester or final grades for the corresponding term. To accomplish this, the statement would be 8 AND 17 AND 12 AND (13 OR 22)
- Save & Test to ensure the filter is pulling the data as expected.
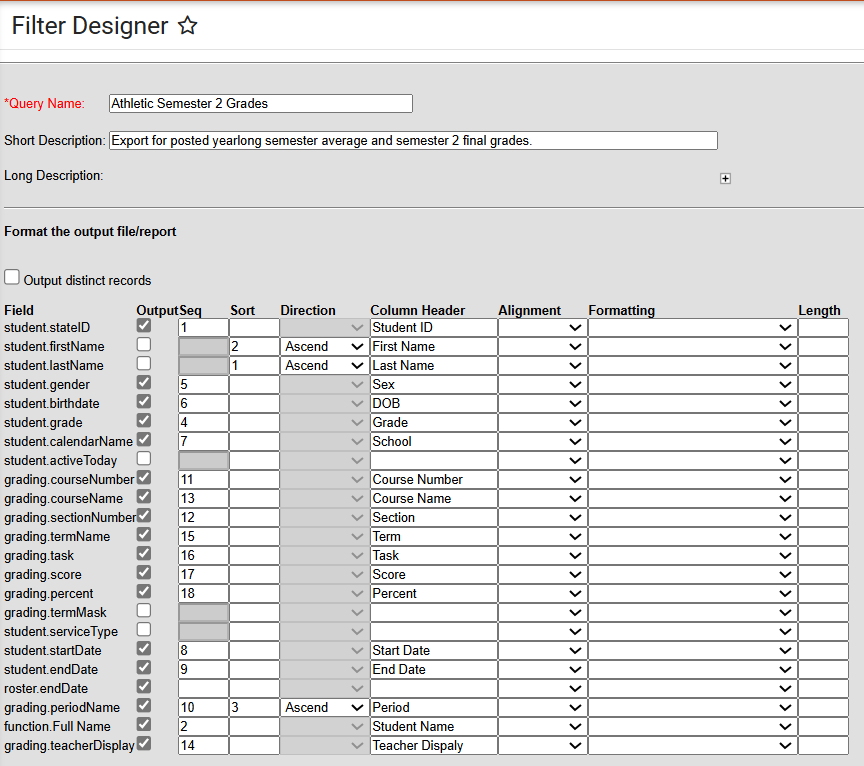
- Click Next to update the output of the data. Updating the columns with column header information so data is easier to view when exported.

- Click Save & Test to save this filter. Be sure to save the filter or a copy of the filter for the user group that will need access.


Semester 2 Grading Ad Hoc
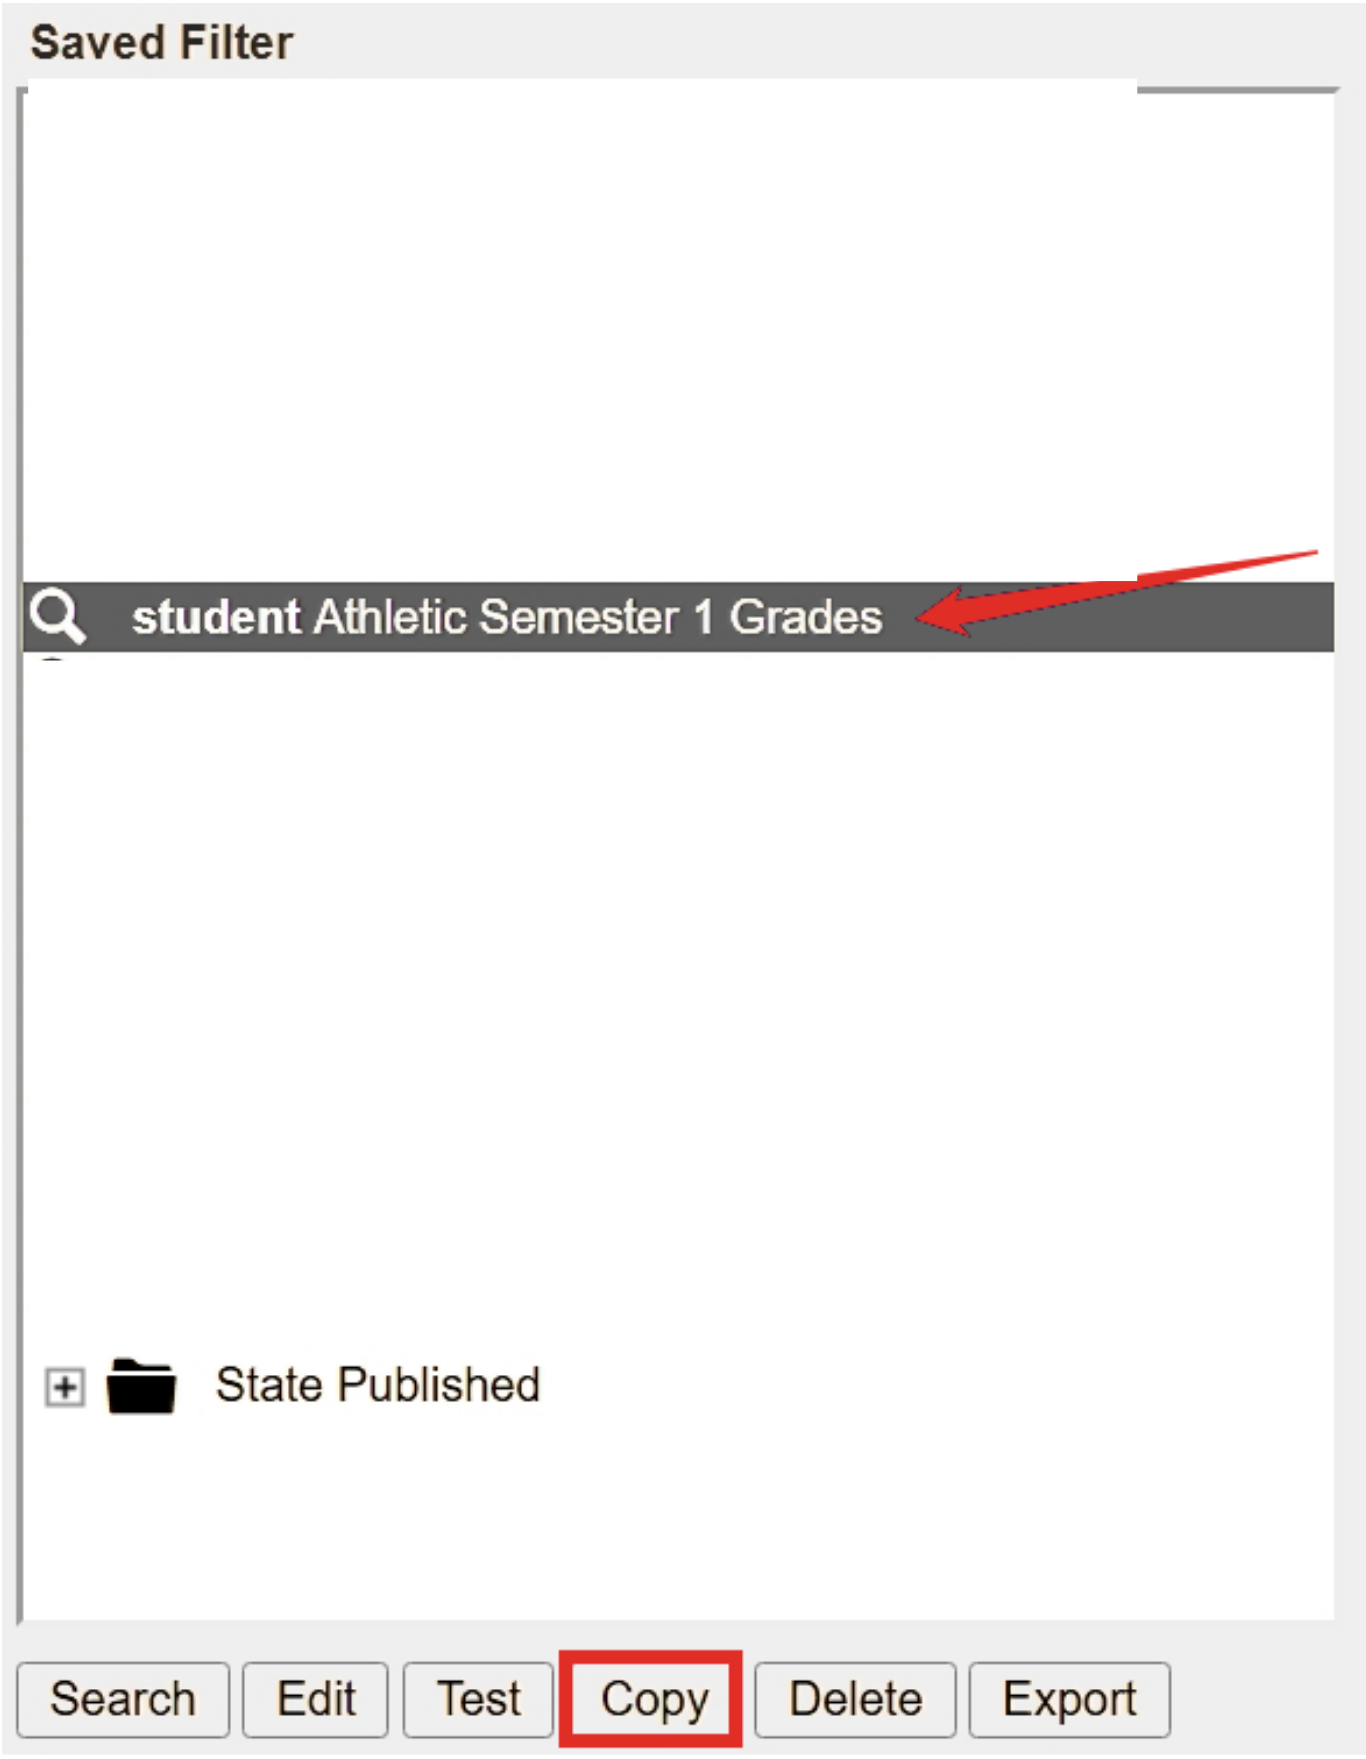
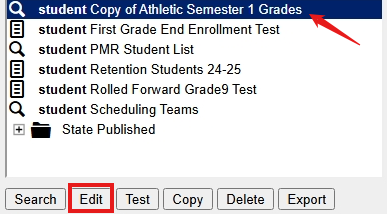
- Make a Copy of the Semester 1 Grading Ad Hoc filter by selecting the saved filter and clicking Copy. A message stating that the filter was copied will display. Click OK to copy the filter.
-
Click on the copied Filter and click Edit.
- Update the Name of the Filter to reflect the correct semester.

- The fields included are the same, however the filter selection will need to be adjusted for the corresponding term.
- To ensure you have the correct information, you will need to filter for active students with a primary enrollment and for grades in the corresponding term (i.e. Q2) and the corresponding grading task names (i.e. Semester Grade). Below are recommended filters.
- student.activeToday=TRUE
- student.serviceType=P
- grading.termName=Q2 - (this will be the term found in Term Setup for the school)
- grading.task=Semester Grade - (this will be the Grading Task name for the corresponding term)
- grading.task=Final Grade - (Remember to add another grading.task in the filter to include both semester and final grades)
- Remember when using more than one filter, a Logical Expression will be needed so the filter knows how to meet the criteria selected. The logical statement will depend on the ID for the field. In the example below, the student.activeToday ID is 8. So, when using it in a logical expression you will refer to ID 8.
- We need to tell the system how a student must meet the selected filter. We need the student to be active today for the primary enrollment and include semester or final grades for the corresponding term. To accomplish this, the statement would be 8 AND 17 AND 12 AND (13 OR 22)
- To ensure you have the correct information, you will need to filter for active students with a primary enrollment and for grades in the corresponding term (i.e. Q2) and the corresponding grading task names (i.e. Semester Grade). Below are recommended filters.
- Save & Test to ensure the filter is pulling the data as expected.
- Click Next to update the output of the data. Updating the columns with column header information so data is easier to view when exported.
- Click Save & Test to save this filter. Be sure to save the filter or a copy of the filter for the user group that will need access.


Once the filters are created navigate to Reporting > Ad Hoc Reporting > Data Export, select the filter and format to export. The recommended file type is Delimited values (CSV).
Provide the reports to staff as needed.

