See the PMR Validation Review article for guidance on clearing fatal validations and reviewing warning and informational validations.
See the NC Principal's Monthly Report Extract | Infinite Campus article for more details on the PMR Extract report.
PMR Submission Verification Process
After PMR Validation FATALS are cleared, navigate to Reporting > NC State Reporting > NC PMR Extract.
Complete the following steps in the exact order below to submit the PMR Extract. All steps must be completed by the same person using the same login.
Generate the Extract
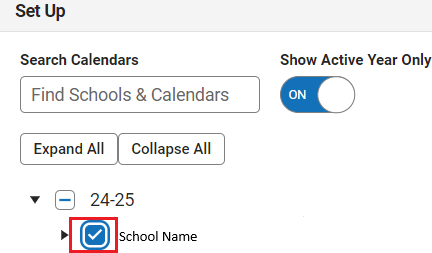
- Setup > Select School & Calendar
-
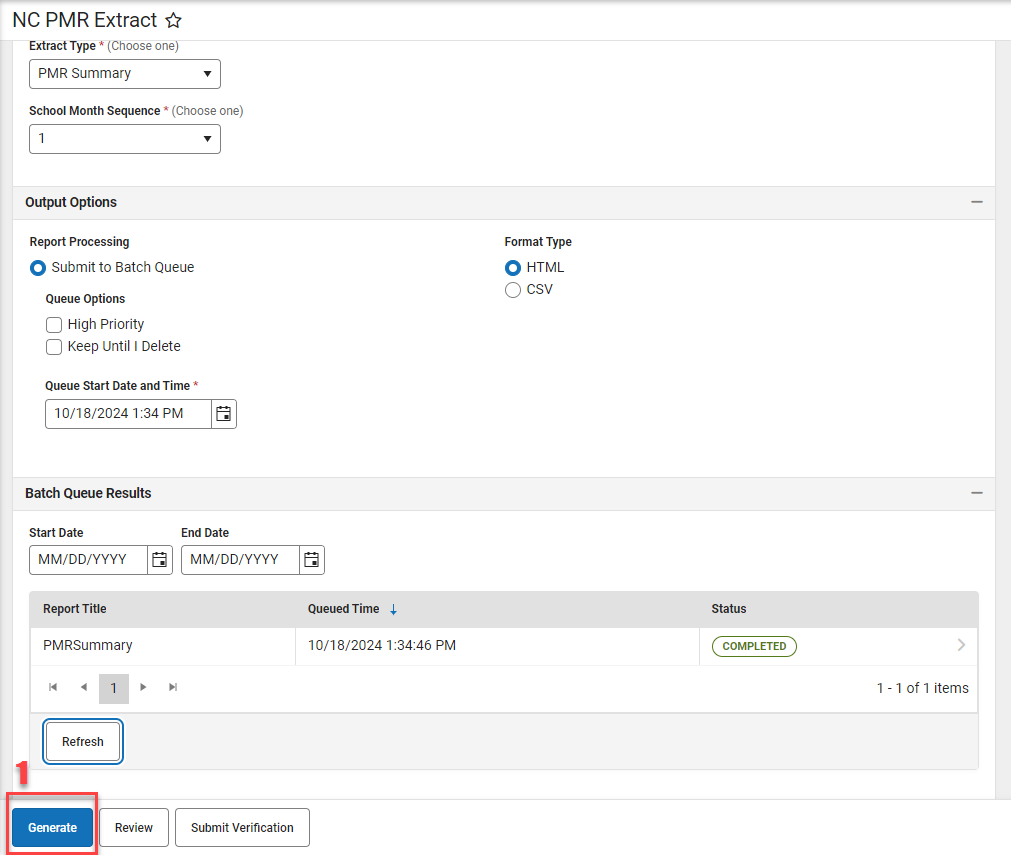
Report Options
-
Extract Type = PMR Summary
- School Month Sequence = Choose the applicable school month
- If there are Fatal Validations, the PMR Extract will not generate and a message box similar to the one below will appear.

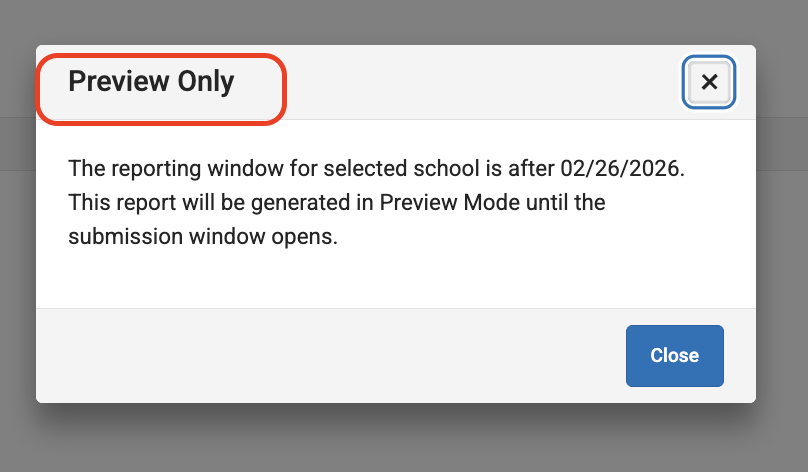
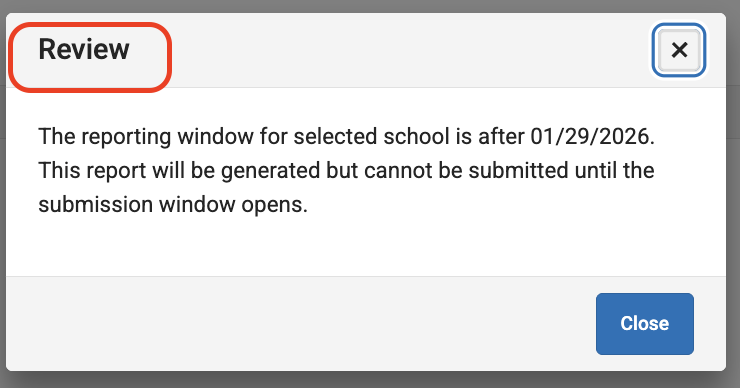
- If the PMR Extract is being generated before the review window opens, which begins the first instructional day after PMR month ends and is open for 10 instructional days, a message box similar to the one below will appear. Close the box.
- If the PMR Extract is being generated during the review window but before the submit window is open, which begins the first calendar day after the review window and is open for 5 calendar days, a message box similar to the one below will appear. Close the box.
- If there are Fatal Validations, the PMR Extract will not generate and a message box similar to the one below will appear.
-
- Generate PMR Summary by using the Submit to Batch Queue option.
-
Select Completed to see the PMRSummary report. Confirm the accuracy of the information contained in the PMRSummary report.


Review the Extract
- Click the Review button to run the PMRSummary. Important: Ensure the MLD, ADA, and ADM counts are correct when reviewing.
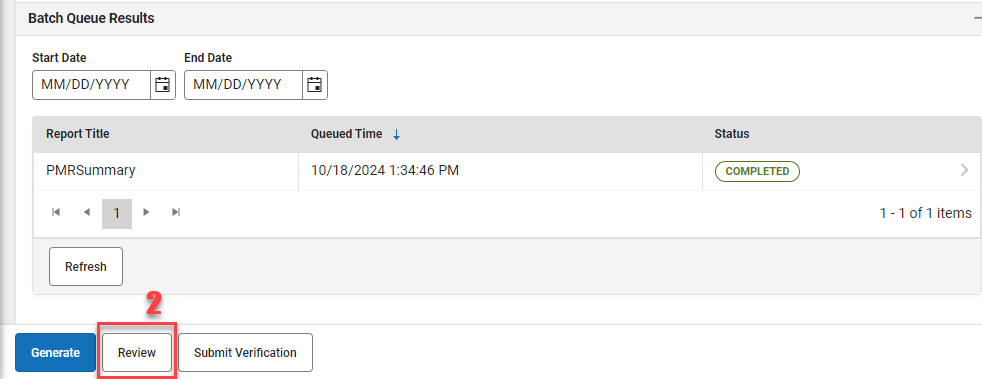
- A new PMRSummary report will be populated in the Batch Queue.
-
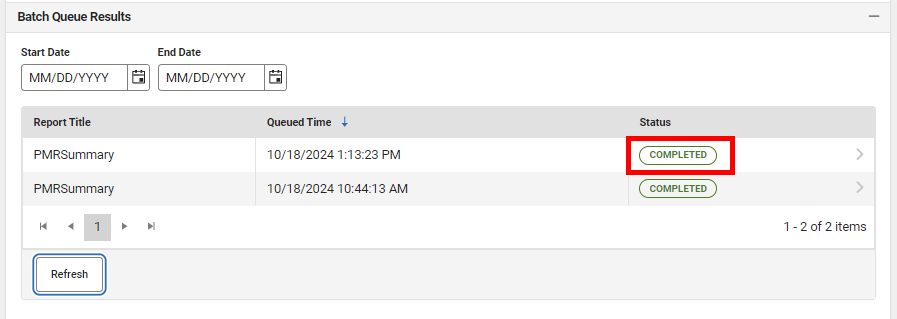
Select Completed to see the report. The information should match the previous PMRSummary completed in the above steps.
-


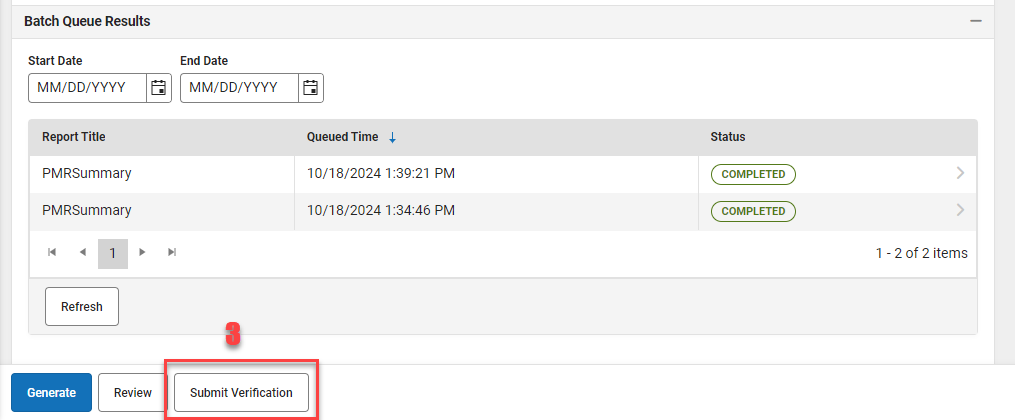
Submit Verification
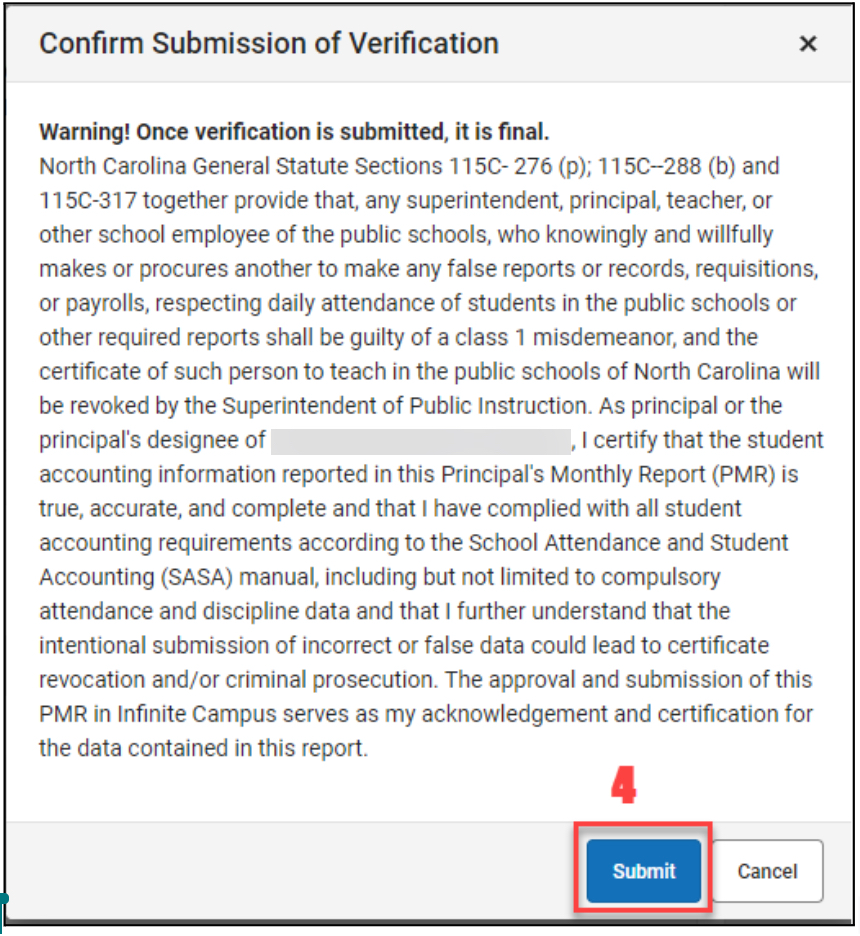
- Click Submit Verification of the reviewed PMRSummary.
Click Submit to confirm the submission on the following screen.
-
A green pop-up message in the upper right corner will state “Success”. This message indicates the batch process was successfully completed only. This does not indicate a successful submission of the PMR.

-
Once Submit Verification is clicked another PMRSummary batch file will be created. There should be 3 total PMRSummary reports generated for the complete process.
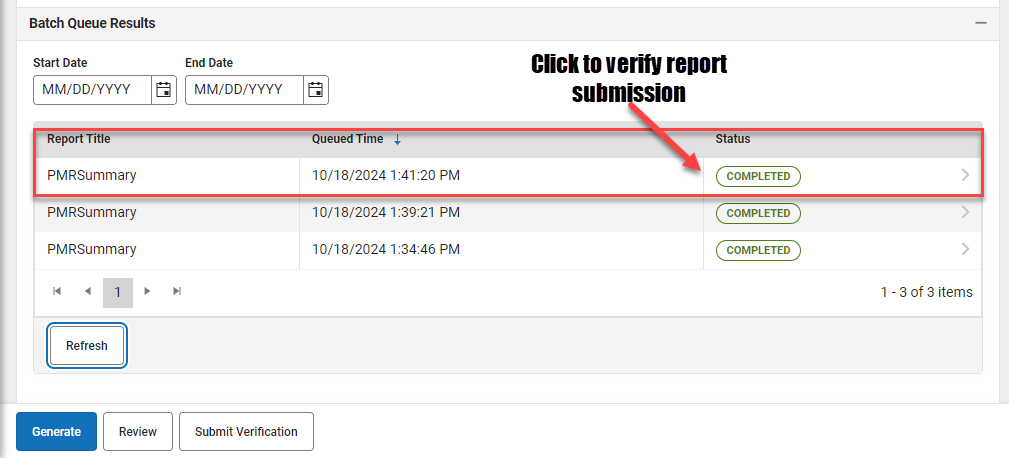
- Select Completed on the final PMRSummary report to check for errors or completion.
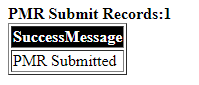
- If the PMR is submitted successfully you will see the below message.
- If the Review Step is skipped, you will see the below message (please perform the Review Step):

- If the PMR is submitted successfully you will see the below message.


Note: If the report batch shows Status = Error, submitting to the batch queue failed. Perform the action again.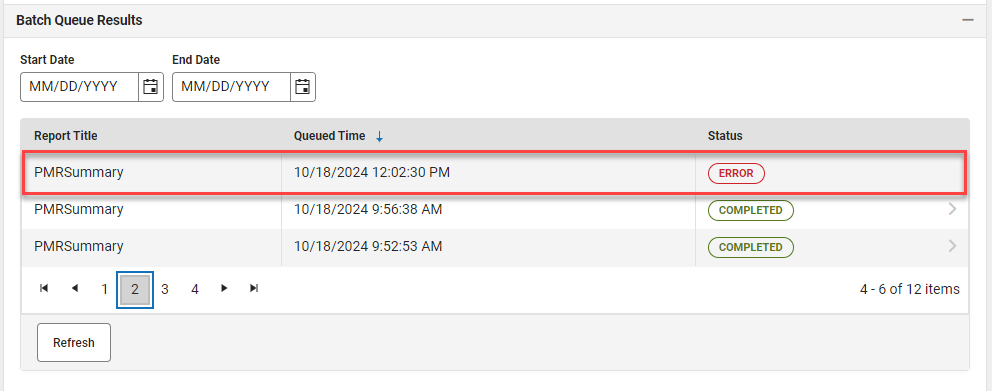
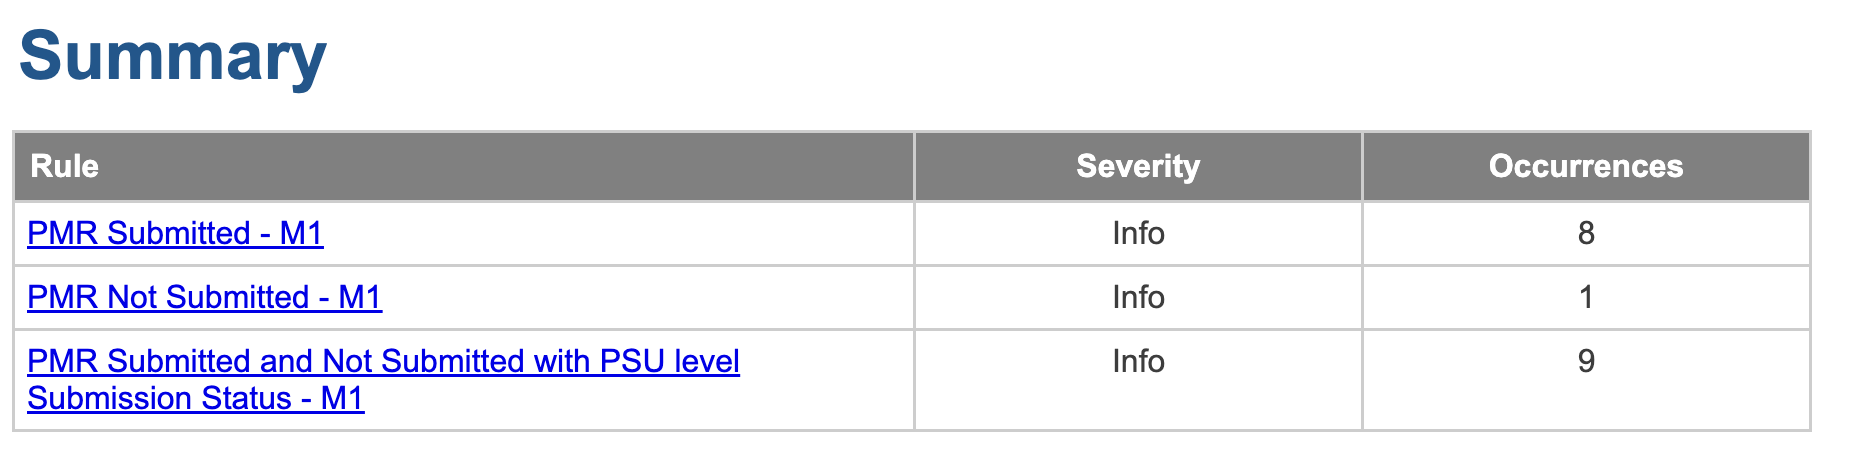
PMR Submission Status Report
This report can be generated at the all schools level to get a summary of schools that have submitted or have not submitted the PMR for the selected School Month.
Reporting > Data Validation > Data Validation Reports
1. Select Data Validation Group: PMR Submission Status - M# (the month number you want to validate)
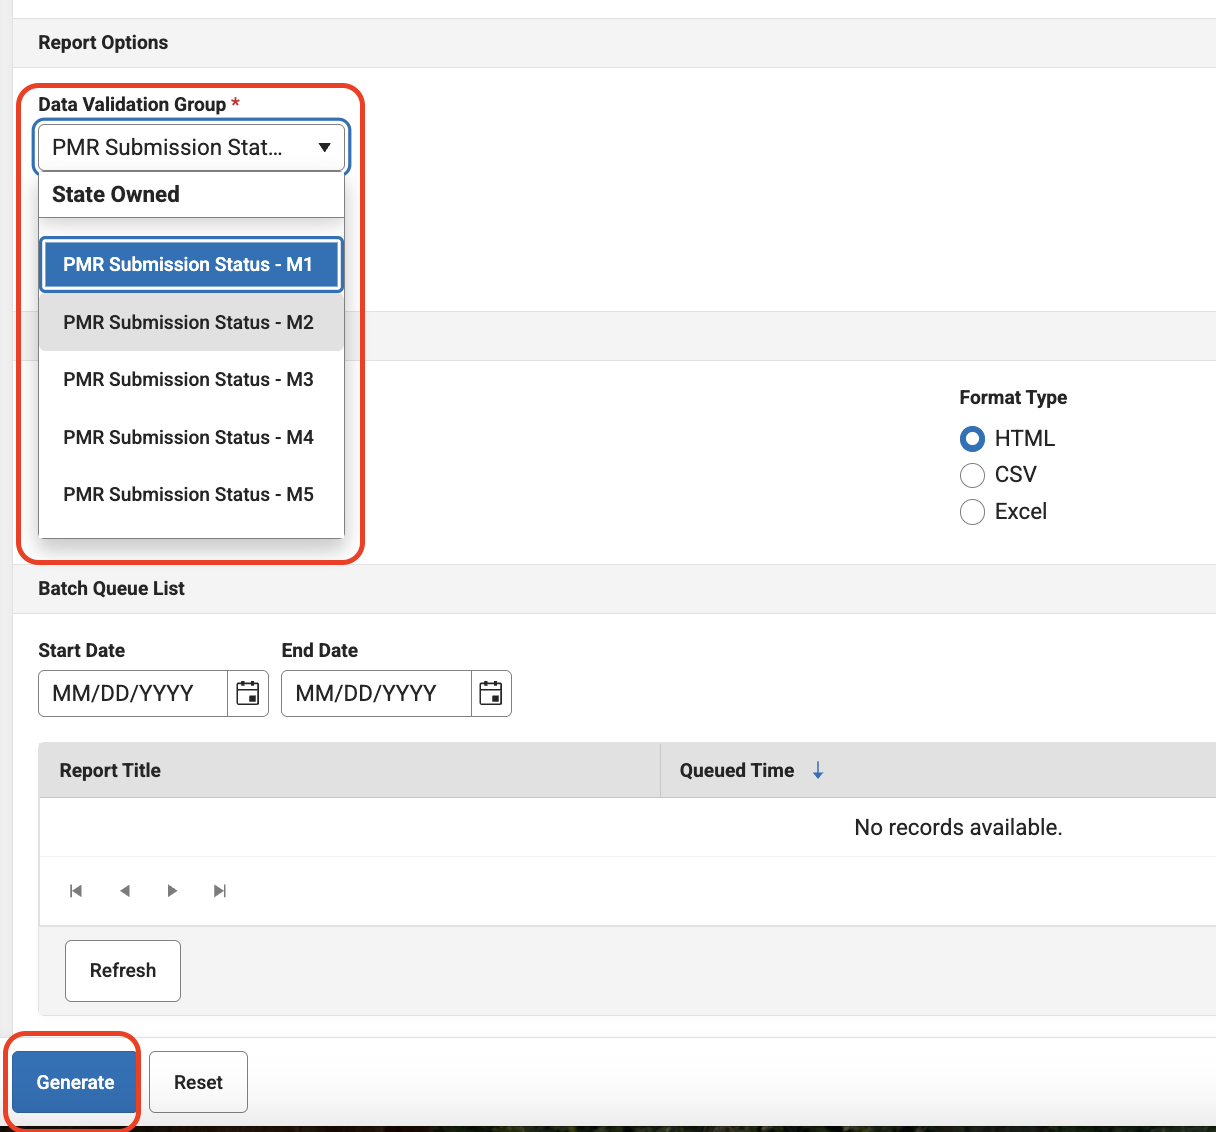
2. Click Generate to view the report. Below is an example of the summary data validation report