Test Results Report
Use the Tango below for steps on how to run reports for students without scores, or those that have scores.
Student Test Results-CPR Tango
Adding CPR Results Manually
Use the steps below to add a CPR result for an individual student.
Navigation: Menu > Student Information > General > Assessment
- Select a Student: If a student is not selected, click Open Student Search tool to search by the student's name. Search for student's using advanced searches or Ad Hoc Filters as needed. Select the student's name to open Assessment tool. If a student was already selected, the Assessment tool will open automatically.
Click New.

Choose CPR (CPR) from the test dropdown.

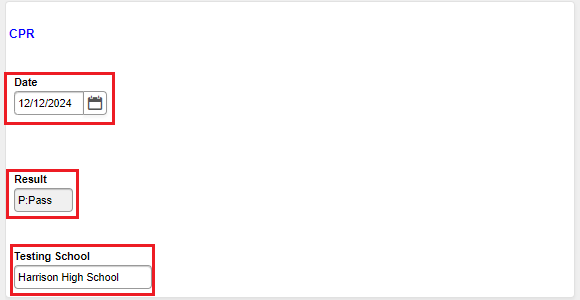
Enter the Date in MM/DD/YYYY format.
Choose P: Pass from the Result dropdown.
Enter the Testing School.
Click Save.
The CPR assessment will now be listed in the Test Scores section of the Assessment tool.

Import Assessments
Use the steps below to import CPR results for a group of students. Users must have the appropriate tool rights to import assessments.
Before importing, ensure the file using for import has the appropriate fields and is saved in a CSV (Comma Separated Value) format.
Fields that must be included:
| State ID |
| Student Last Name |
| Student First Name |
| score.date - in MM/DD/YYYY format |
| score.result - P |
| score.schoolNumber - ###### where the first three digits are the district number, and the last three digits are the school number |
If the file has more fields that what is listed above, that is okay. The mapping process will only map the fields that are needed in the assessment.
Navigation: Menu > Student Information > Assessment Administration > Assessment Center

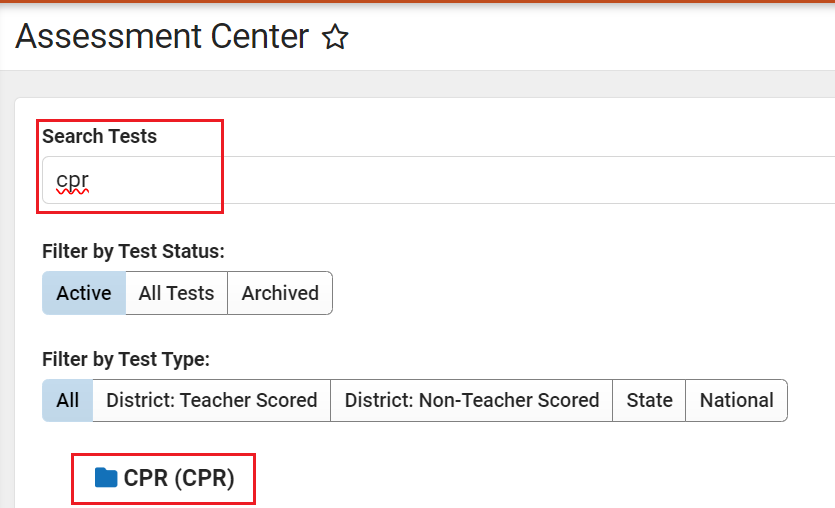
- Search for CPR in the Search Tests field.
- Select CPR (CPR).
- Verify the information for the test detail is for the CPR assessment. (do not change any details), then click Save & Next to continue to the next step.
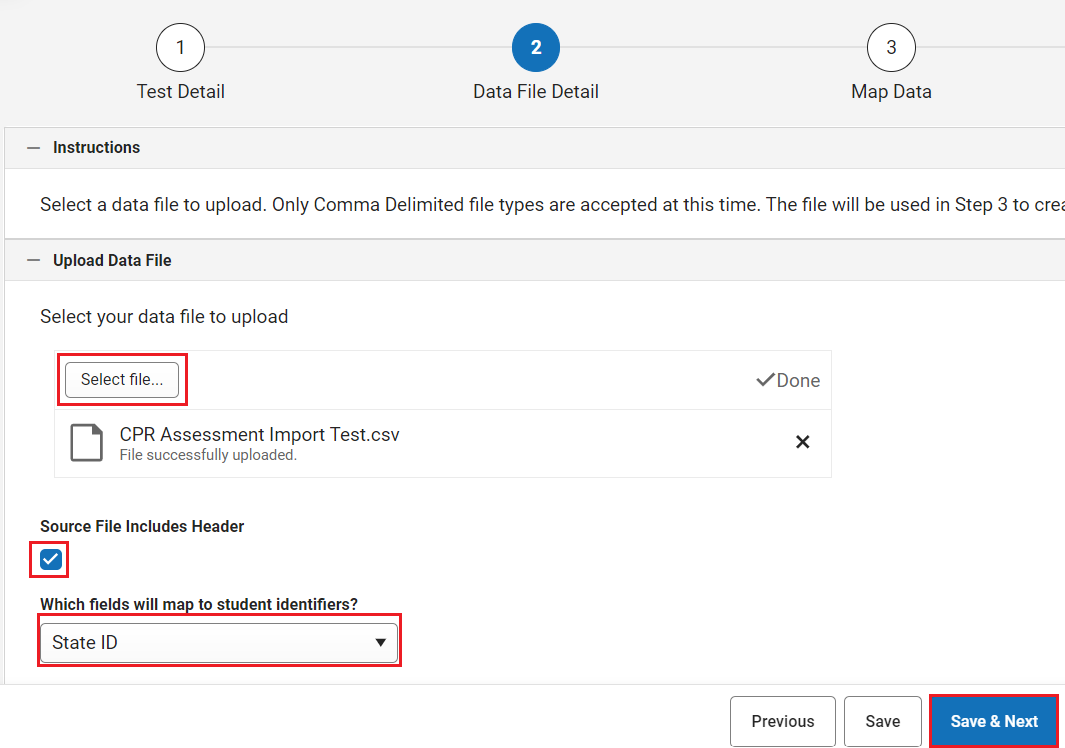
- Click the Select file button and locate the CSV file with the assessment data. (see note above about required fields).
- Check the box for Source File Includes Header.
- Choose State ID from the dropdown for which fields will map to student identifiers.
- Click Save & Next to continue to the next step.
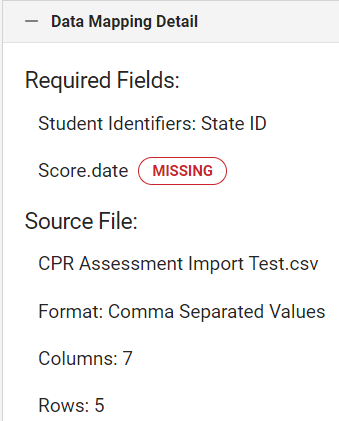
- Review the Data mapping details for the required fields or for any errors. If required fields are listed as missing, the format of the fields may need to be corrected in the data columns for import section.
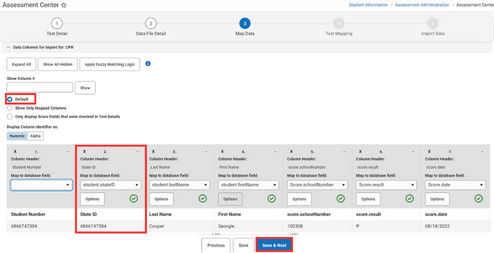
- The columns included in the data file will be displayed in the Data Columns for Importing section. Check that each required column is mapped to the correct database fields and in the correct format. Click Options to select the correct format if necessary (see images below as an example). Note: Column Header fields may vary but must be mapped to the correct database field. See the chart below for the correct field mapping.
- A green check with a circle indicates that the fields are mapped correctly. A red X means the options for the column must be selected. Click on Options to select the correct one. Once required fields have been mapped appropriately, click Save & Next to continue to the next step.
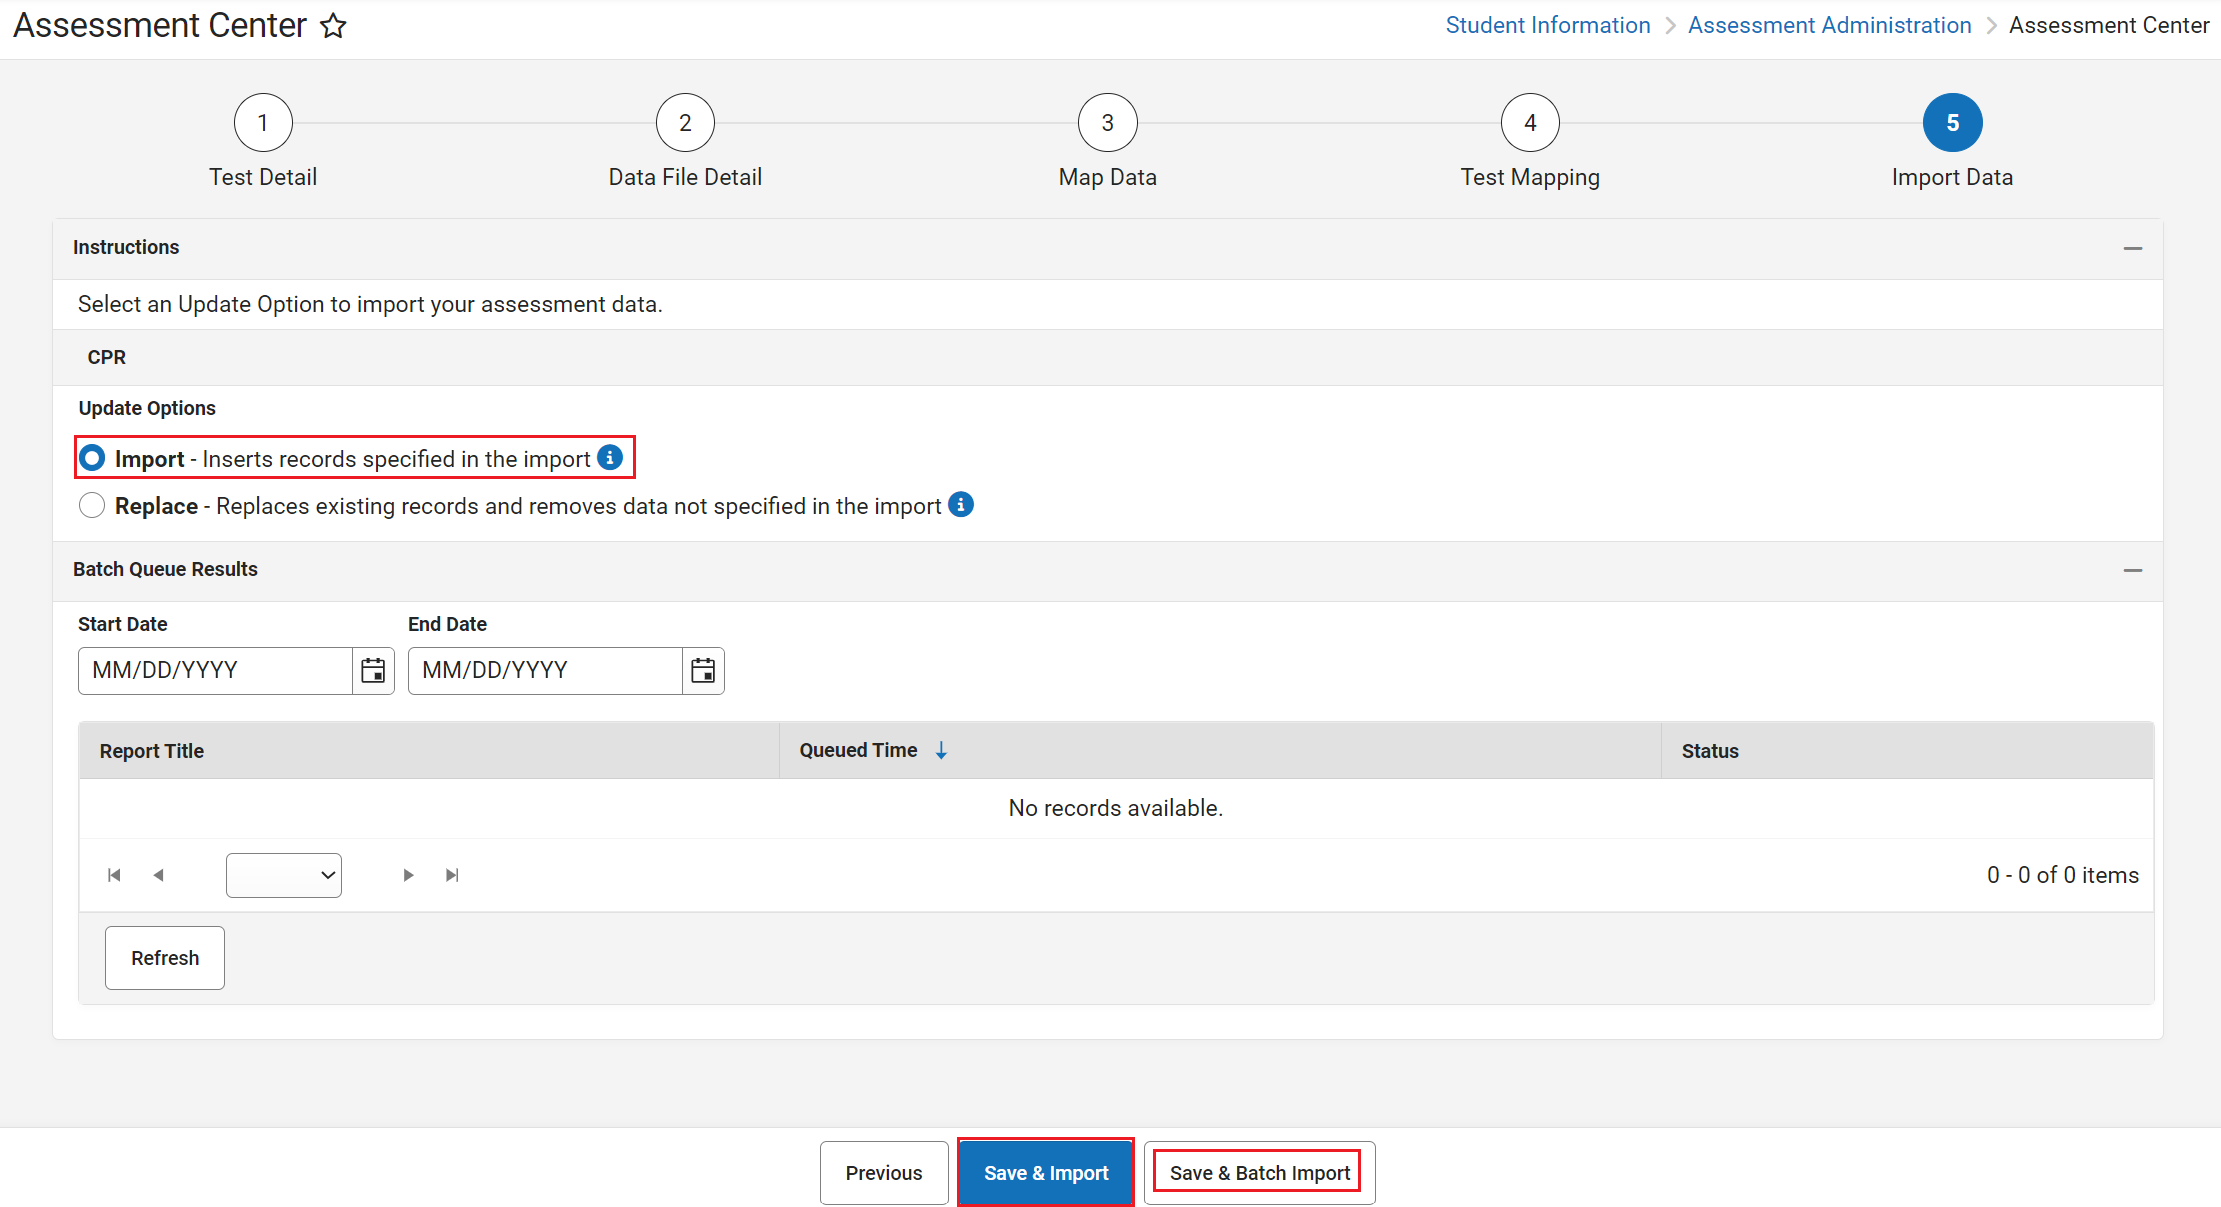
- Select Import for the Update Options.
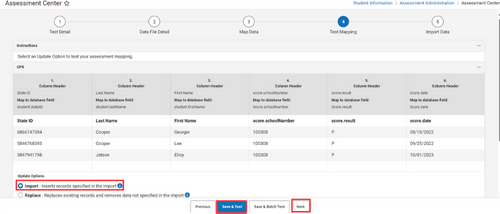
- Select Save & Test to see any possible errors or warnings. If there are warnings, click the Previous button to review the mapping options. Correct database fields or mapping options as needed. Once the mapping options are corrected, click Save & Next to continue to the next step.
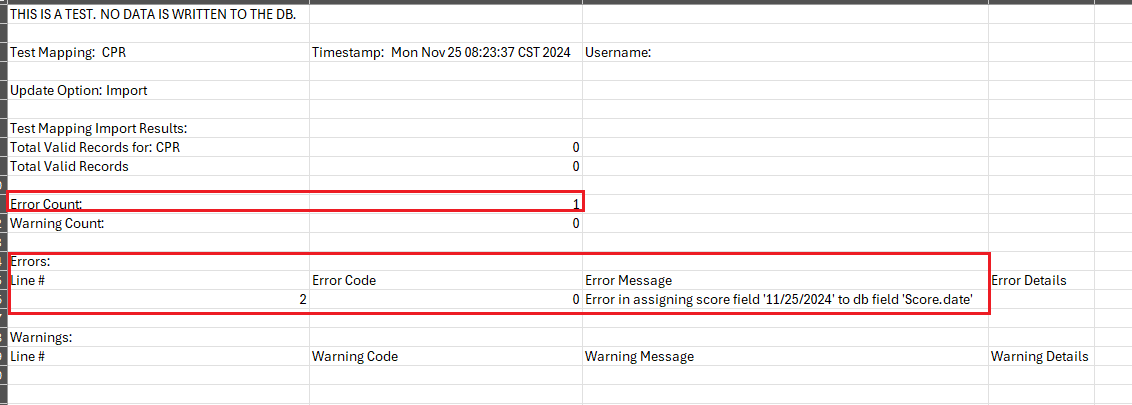
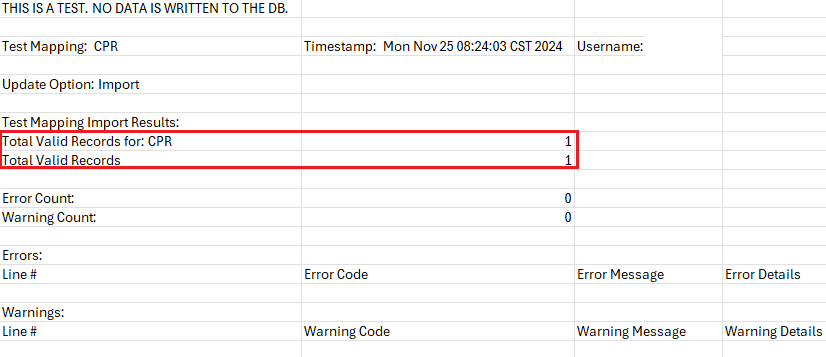
- Click Save & Test again to verify there are no errors and warnings and valid records are listed.
- Click Next to continue to the next step.
- Verify that Import is selected as the Update Option. Click Save & Import. For large files, click Save & Batch Import.
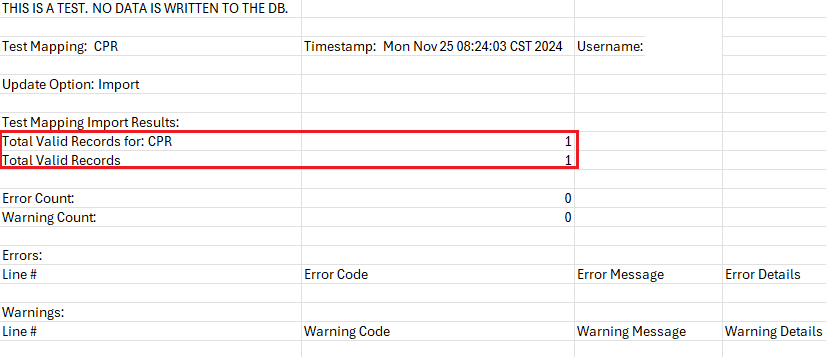
- Review the import results to ensure there were not issues with the importing of the assessments.
| Column Header Data File | Database Field Mapped |
|---|---|
| State ID | student.stateID |
| Last Name | student.lastName |
| First Name | student.firstName |
| Date of Test | score.date (Ensure the options are MM/DD/YY or MM/DD/YYYY)  |
| Results | score.result |
| School Number | score.schoolNumber |
Check a few student's assessments by searching for the student and navigating to Student Information > General > Assessment. The newly imported score should be listed in the Test Scores section. Click on the score to expand and see the detail for the assessment.


