
The following article walks users through adding a staff member, updating the demographics, adding district assignments, and user accounts as necessary.
Before adding a new staff member, ensure you have the following information:
-
Full legal name
-
Date of birth
-
Gender
-
Race/Ethnicity
-
Start date
-
Position/Role
-
Staff email address
-
Phone number
Staff Locator Wizard
Navigation: Census > Staff > Staff Locator Wizard
For more information regarding the tool, view the Staff Locator | Infinite Campus article.
- Enter the required information, which includes the staff member's Last Name, First Name, Gender, and Date of Birth.
- Click Search.

- If a match is found, click on the Staff member’s name.
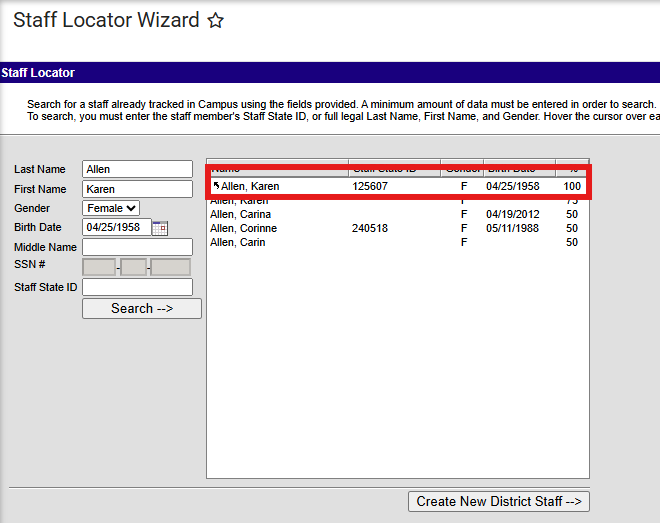
Existing person record matching staff member.
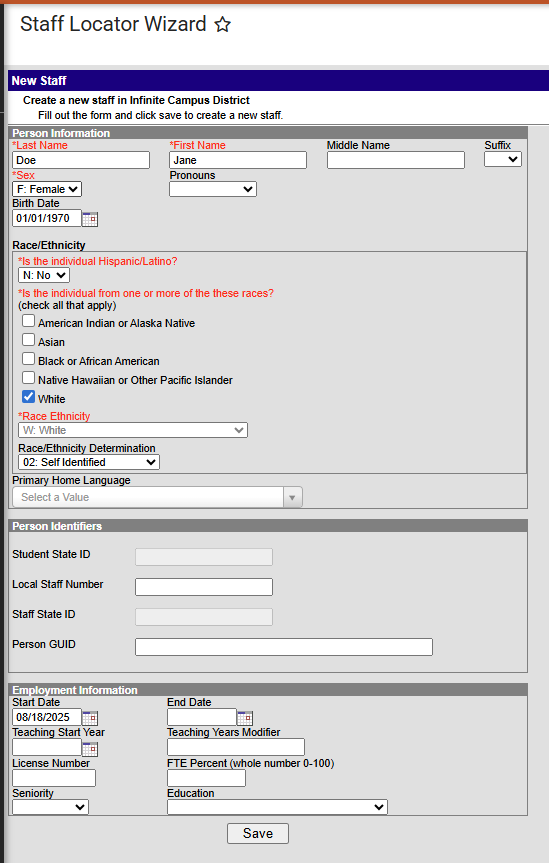
- If a match is not found, click Create New District Staff.

Create new district staff.
Each person should only appear once in Infinite Campus. If a staff member was previously a student, use that existing record and update their role to staff. Likewise, if the person already exists as a parent or emergency contact, select that record and update it to staff instead of creating a new entry.
- Enter the required information for Race/Ethnicity. If the Race/Ethnicity fields are not displayed, click Edit to expand the section.
- Select 02: Self Identified from the Race/Ethnicity Determination dropdown menu.
- In the Employment Information section, enter the employment start date.
- Follow your PSU procedures for including other fields in this section.
- Click Save.
Staff Demographics
Once the Staff Locator Wizard updates have been saved, the Demographics tool displays. The staff member must be assigned an NC Staff ID if one is not displayed in the Staff State ID field. Follow the steps below to assign a NC Staff ID and update the staff members personal contact information.
- Navigate to the Person Identifiers section.
-
Click on Assign NC Staff ID.

-
Ensure the Last Name, First Name, Gender, Birth Date and Race/Ethnicity is filled in.
-
Click Search.

-
Select the correct record with the matching Staff UID.
-
Copy the Staff State ID and paste in the Local Staff Number field.

-
Click Save.
-
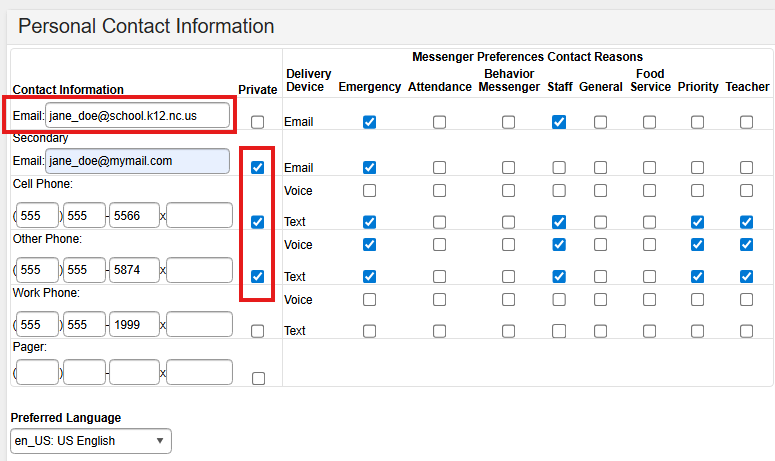
Enter the staff member's work email address in the first email field. Check the boxes for messenger preferences per PSU guidelines.
-
Add the staff member's work phone number in the work phone field. Check the boxes for messenger preferences per PSU guidelines.
-
Add personal phone numbers or emails as needed. (Optional)
-
Click Save.
Personal phone and email numbers should be marked as private so personal staff information will not be displayed in the student or parent portal. Checking private allows the contact information to be used for calling/messenger systems.
Include Staff Addresses in Infinite Campus (Optional)
Navigation: Census >Households > Census Wizard
-
If a PSU wishes to include staff addresses in Infinite Campus, a Household record must be created.
-
If the staff member is already part of a Household in Infinite Campus, no additional action is required.
The Census Wizard is a three-step process where the user first searches for staff and the staff mailing address, then assembles the household.
Note: Before using the Census Wizard to assemble the household, verify that the staff and their address have been added in the system.
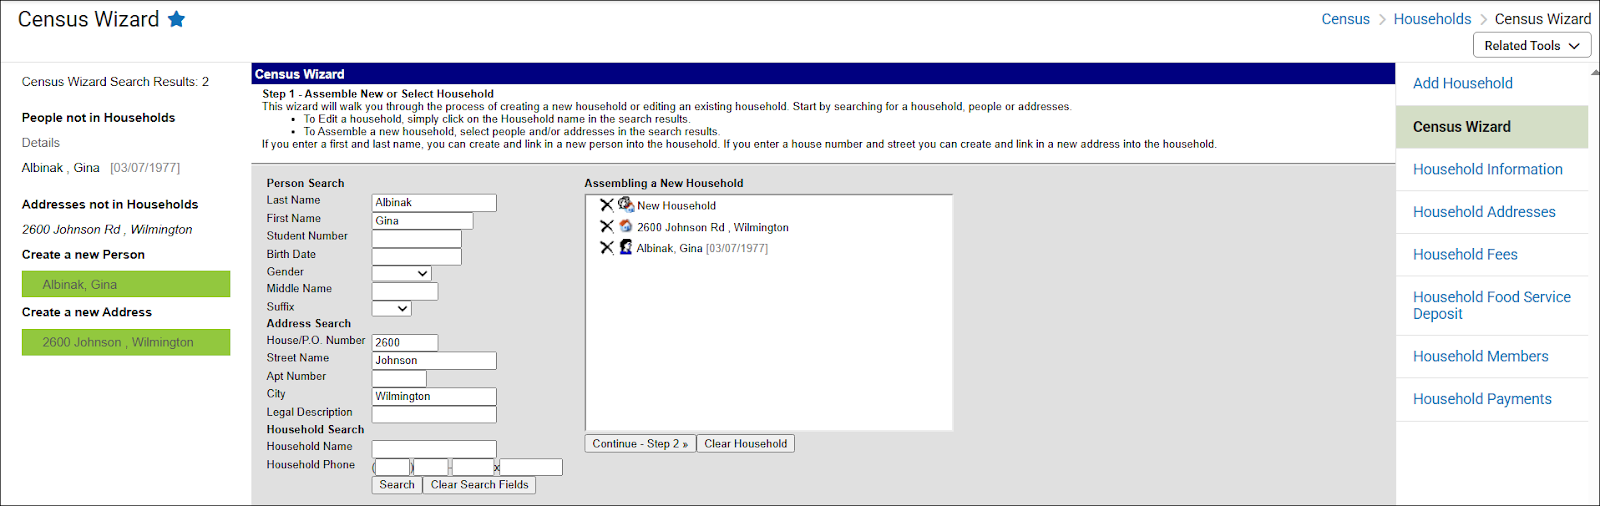
Step 1: Assemble New or Select Household
-
Enter search criteria in the Person Search and Address Search fields.
-
Click the Search button located beneath the search section. Matching results appear in the Census Wizard Search Results section on the left.
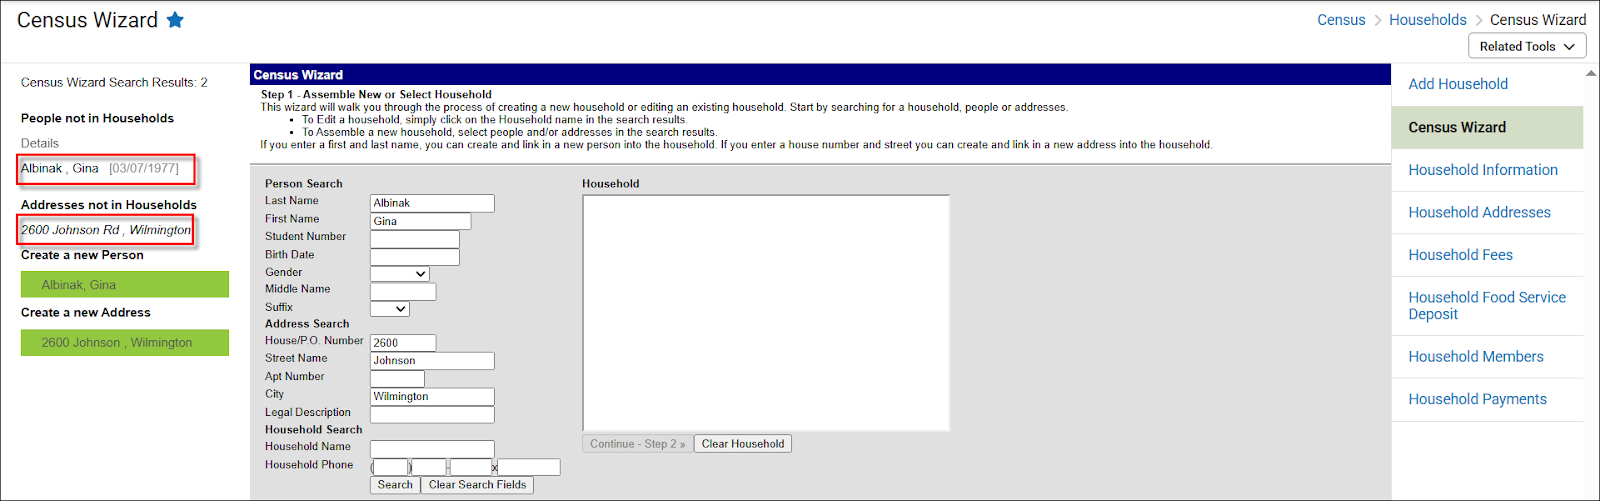
- Select the staff member from beneath the People not in Households header, since the staff member should already be in Infinite Campus, but not currently in a Household.
- Select the address from under the Address not in Household header, since the address should already be in Infinite Campus, but not currently in a Household.
- Save & Continue – Step 2
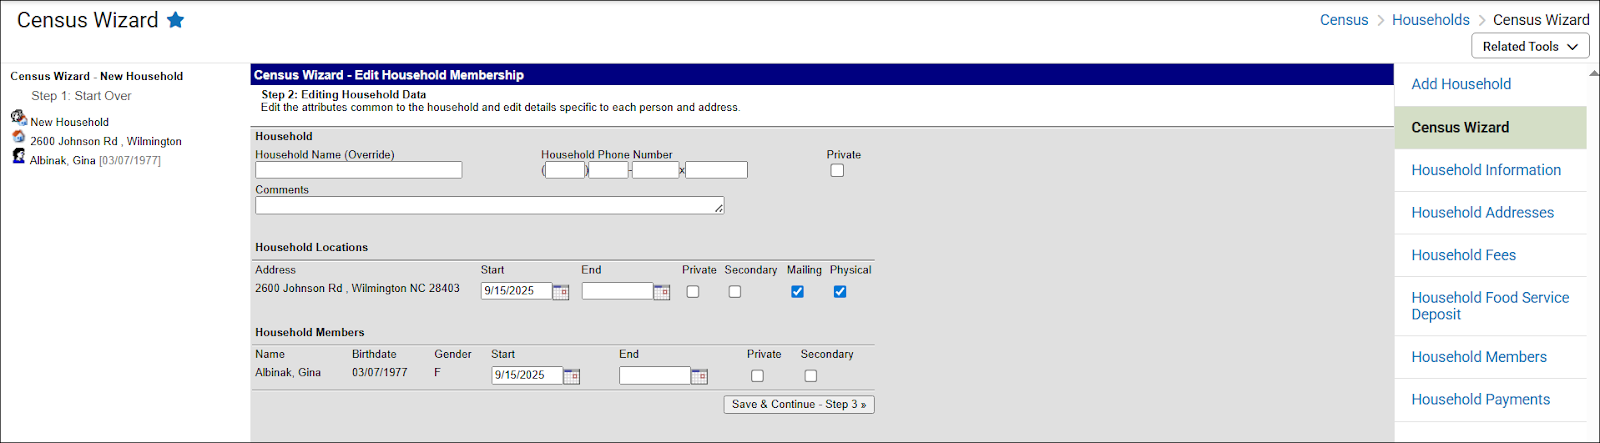
Step 2: Editing Household Data
-
Verify and enter appropriate information.
-
Click Save & Continue – Step 3
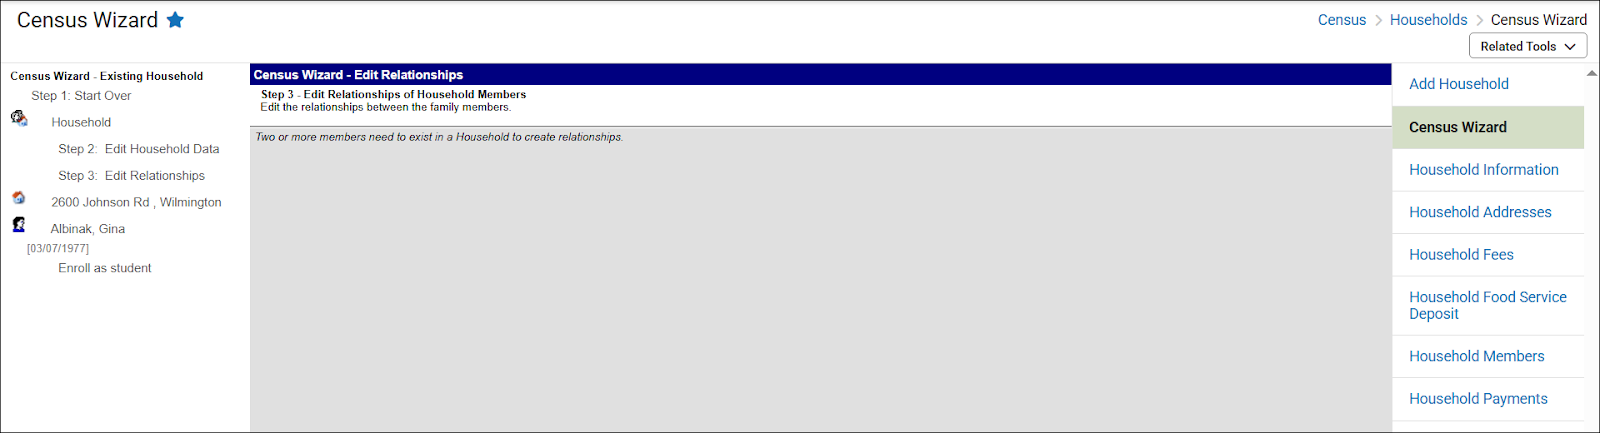
Step 3: Edit Relationships of Household Members
-
No action required

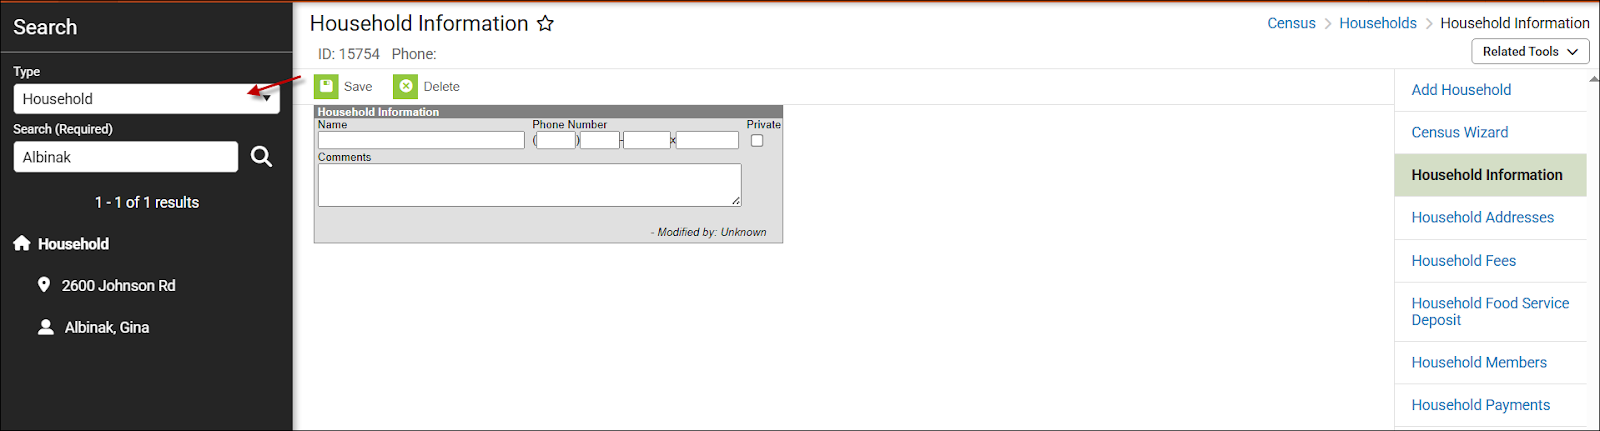
To view and verify the household information through a Household search.
Staff District Assignments
Navigation: Census > Staff > District Assignments
A district assignment determines a staff member's access to the school in areas of the SIS that are not controlled by tool rights. For more information about the district assignment tool, view the District Assignments | Infinite Campus article.
- Click New.

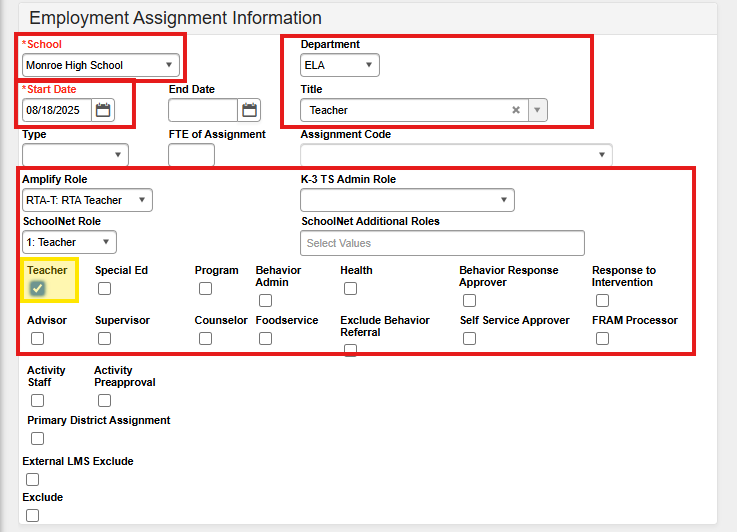
- The calendar context determines the school in the school dropdown menu. Ensure the school assignment is correct.
- Enter a start date for the assignment. This date cannot be a date before the staff's employment start date.
- Select the staff member's Title from the title dropdown menu. Titles are determined by the PSU.
- The Teacher checkbox (highlighted in yellow) must be checked for the staff member to show in the Section Staff History teacher drop-down.
- Follow your PSU procedures for including other fields in this section such as SchoolNet and Amplify roles.
- Click Save.

The new district assignment will display in the staff's assignments.

Staff User Management
Navigation: User Management > User Account Administration > User Account
Staff members who need access to the SIS, must have a user account with the appropriate tool rights and calendar rights. For more information about user management, visit User Account | Infinite Campus article.
- Click New to create a new user account.
Do not assign tool rights or calendar rights to a staff member's Parent Portal account or former student account.
- If the staff member's role is primarily a teacher, set the Homepage to Campus Instruction.

- For other staff members, set the Homepage to Campus Tools.

- Select SAML: NCEdCloud as the Authentication Type.
- Enter the staff member's NC Staff UID as the username.
- Generate or enter a generic password. Users will log in using SSO via NCEdCloud so the password entered here will not impact the user's ability to log in to NCEdCloud.

- Navigate to the user group section.
- Search for the needed User Group and select to add the necessary user group(s) under Current Group Membership.


- Search for the needed Calendar Group and select to add the necessary user group(s) under Current Group Membership.


- Click Save.
Each user will need calendar rights and tool rights user groups assigned to access the correct data in the correct calendar.

