The purpose of this article is to instruct district and charter SIS Coordinators on how to exchange information with NCDPI using eMFTS system and WinSCP.
Subscribing to eMFTS
NCDPI has expanded its eMFTS system (the process used to view and exchange information between NCDPI and PSUs) to include Home Base. The information is viewed and exchanged via WinSCP, an application that allows file transfers between PCs.
To begin using this process for Home Base purposes, please follow the instructions below on how to subscribe and use the system.
Access into this system will require the use of your NCID credentials.
If you do not already have an NCID, begin with step 1, otherwise proceed to step 2.
1. Request an NCID by contacting your NCID Administrator.
2. Subscribe to the eMFTS Apex System by clicking the following link:
Navigation: https://schools.nc.gov/emfts

a. Enter a valid NCID and password, then click Login.
b. Select a program: Select Home Base if you plan to use eMFTS to transfer or receive data for SIS or other school business needs other than Finance. If you are requesting access for the purposes of submitting and receiving from NCDPI's Finance Department, please select Finance. Your username cannot be used for both program areas.

c. Complete the form and click the subscribe button.

d. The screen should display the "successfully submitted message" as seen below:

The status will show as "Pending" and a notification message will be sent to the subscriber's email stating the request has been received.
You will not be able to transfer any files until your eMFTS account status has been updated from Pending to Active and approved by DIT.
It may take several days for DPI and DIT to approve and provide access.
Downloading the WINSCP Application
WinSCP is the file transfer application used to transfer information between NCDPI and PSUs. You will need to download this app to your PC. eMFTS is compatible with other SFTP clients designed for Mac users.
1. Download WinSCP to your PC.
Navigation: https://winscp.net/eng/download.php
 Note: The version may differ during the time of your download.
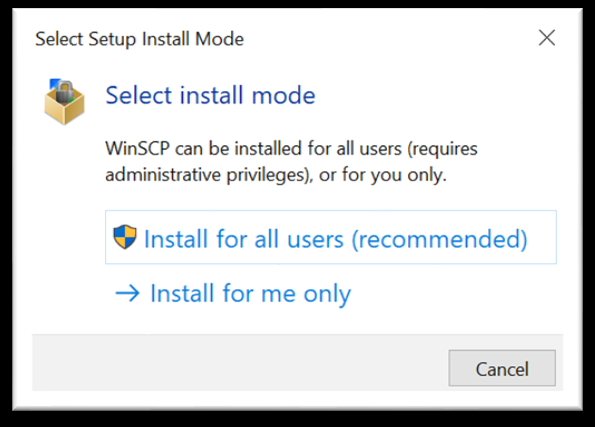
2. Install the application on your computer.
Recommended settings are suggested.


3. Click Finish. The WinSCP icon should appear on your desktop.
4. Open WinSCP and click on New Site in the left windowpane to create a new site.

5. To the right, select File Protocol: SFTP
6. Fill in the Host Name: emfts.schools.nc.gov
7. Type in Port Number: 2220
8. Enter User Name but leave the Password field blank and click Save.
Note: User Name should be the NCID name used when registered.
CAUTION: It is recommended that you do not save your password.
9. A site with your NCID username should appear in the left windowpane.
10. Click on Login at the bottom of the app.
Login connection will not work if the eMFTS status is still Pending or the user account has not been approved by DIT. This may take several days after the request is submitted.
11. Click Yes if you receive the following warning. You may have to click Login again.

12. Click Continue on the Authentication Banner.

13. Enter password. Click OK.

14. Once you are logged into WinSCP, you may begin transferring files. The left side comprises files that are on your PC. The right side should only include folders that you may upload files to and download files from.

NCDPI Administrators may see all school folders.
Charter school folders will begin with "CHR #". LEA folders will begin with "LEA #".

15. When transferring to NCDPI, make sure the folder you are transferring to is open on the right by double clicking the folder.
a. In the left pane, locate and click on the file you wish to transfer from your PC.
b. Select Upload on the menu bar to transfer. You may also left click on the file and drag it over to the folder on the right.
c. Once the file is transferred, contact the recipient of your file via email or phone to inform them that your file has been transferred.

