
Some changes to student data can have a negative impact on the Principal’s Monthly Report (PMR) if not handled correctly. When it is necessary to change one of the following for a student, the Create New Enrollment process must be followed.
Grade level changes
Membership Status changes
Using this process will allow the user to make the necessary change(s) in the system without losing the student schedule or attendance.
Before ending the student's current enrollment, navigate to Student Information > General > Attendance and print the period or daily attendance report to maintain a record of the attendance for the student.
End Current Enrollment
Navigation: Menu > Student Information > General > Enrollments
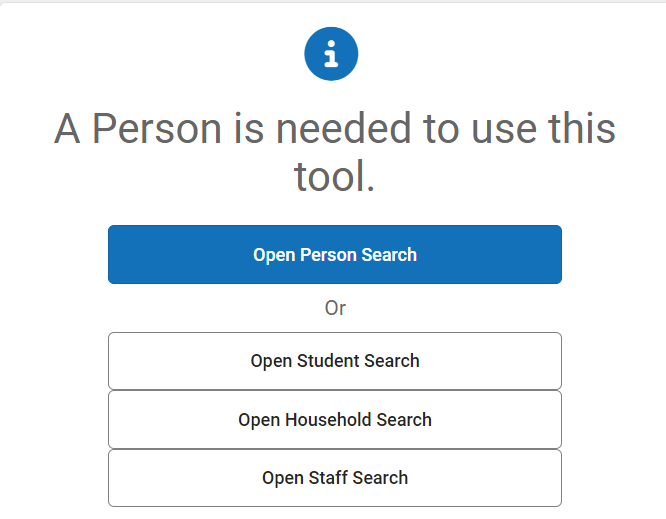
1. Select a Student: If a student is not selected, click Open Student Search tool to search by the student's name. Search for student's using advanced searches or Ad Hoc Filters as needed. Select the student's name to open the Enrollments tool. If a student was already selected, the Enrollments tool will open automatically.
2. Select the current enrollment.
3. Enter an End Date, which should be the last day the student was in the current grade and/or membership.
4. Enter a Local End Status of W1: Transfer Withdrawal.
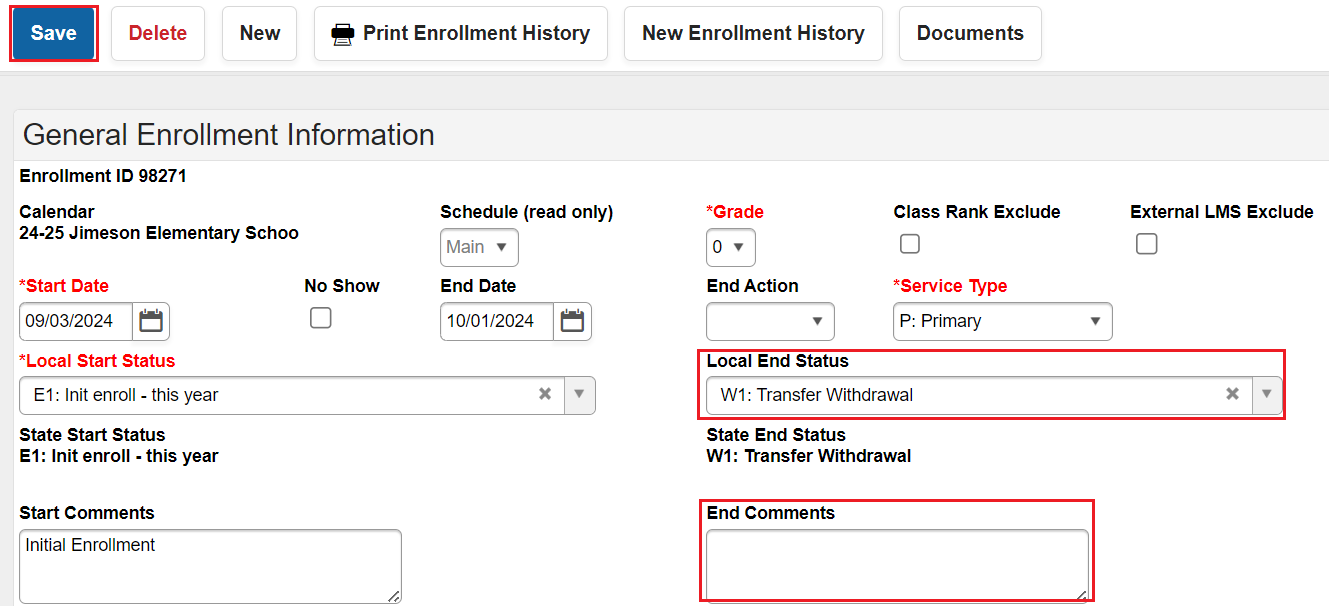
5. Enter an End Comment (optional).
6. Click Save.
The student's current enrollment has now been ended.
Create New Enrollment
Navigation: Menu > Student Information > General > Enrollments
1. Select a Student: If a student is not selected, click Open Student Search tool to search by the student's name. Search for student's using advanced searches or Ad Hoc Filters as needed. Select the student's name to open the Enrollments tool. If a student was already selected, the Enrollments tool will open automatically.
2. Click New.

3. Verify Calendar and Schedule are populated correctly.
4. Select the correct grade from the dropdown.
5. Enter the Start Date. This is the student's first day in the new grade or membership.
The previous enrollment end date and new enrollment start date should not overlap.
6. Choose the correct Service Type from the dropdown.
7. Choose R1: Re-Entry - prev in W1 as the Local Start Status.
8. Add a Start Comment (optional).

9. Locate the State Reporting Fields and select the correct Admission Status from the drop down.
10. Select the correct Resident District, Resident School, Serving District, and Serving School.

11. Click Save. 
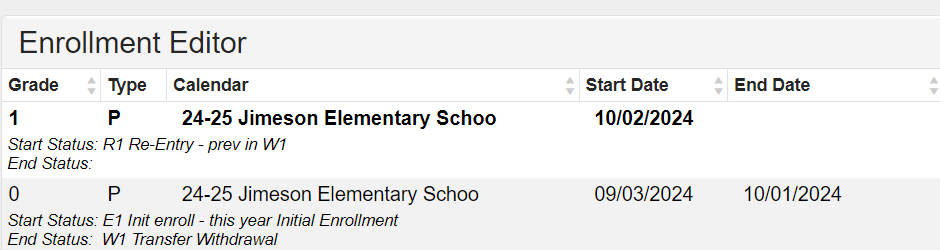
The student's enrollment record will reflect an end enrollment and new enrollment with the correct local start and end statuses.
Update Student's Schedule
Navigation: Menu > Student Information > General > Schedule > Walk-In Scheduler
If the student will remain in the same sections, use the restore rosters steps below. If the student will be in new sections, search and select the new sections ensuring that the effective date is the same as the student's enrollment start date. 
Restore Rosters
- Select the blue arrow next to Load and click Restore.
- In pop-up window enter student's enrollment Start Date
- Click the blue Restore button.
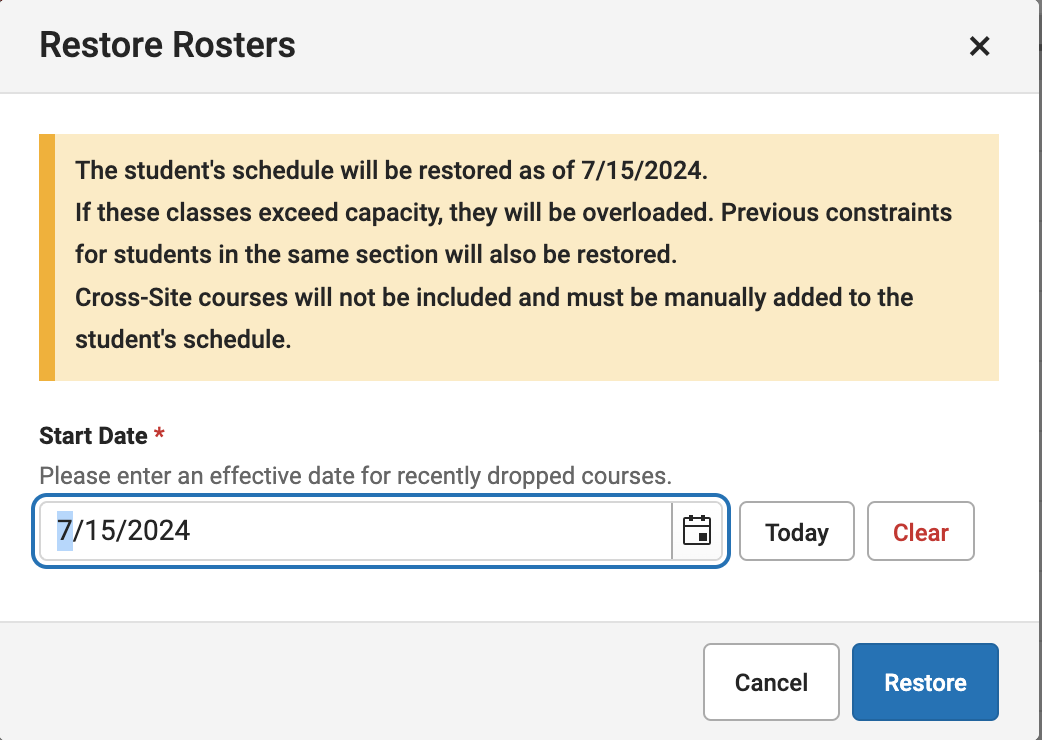
- A green pop-up will verify Schedule has been Restored

Cross-site enrollment sections will have to be added back to the student's schedule manually.
Any attendance that occurred after the student's original enrollment end date, will have to be added back to the student's attendance record. Refer to the attendance reports saved at the beginning of this process.
For School Track Enrollment changes, the student must be enrolled in the correct school calendar. Follow the steps in Student Enrollment Checklist to enroll a student in another school calendar.

